Control wires with foam mounts

foam wire mount on flightone flight controler

foam wire mount on flightone flight controler

foam wire mount on flightone flight controler

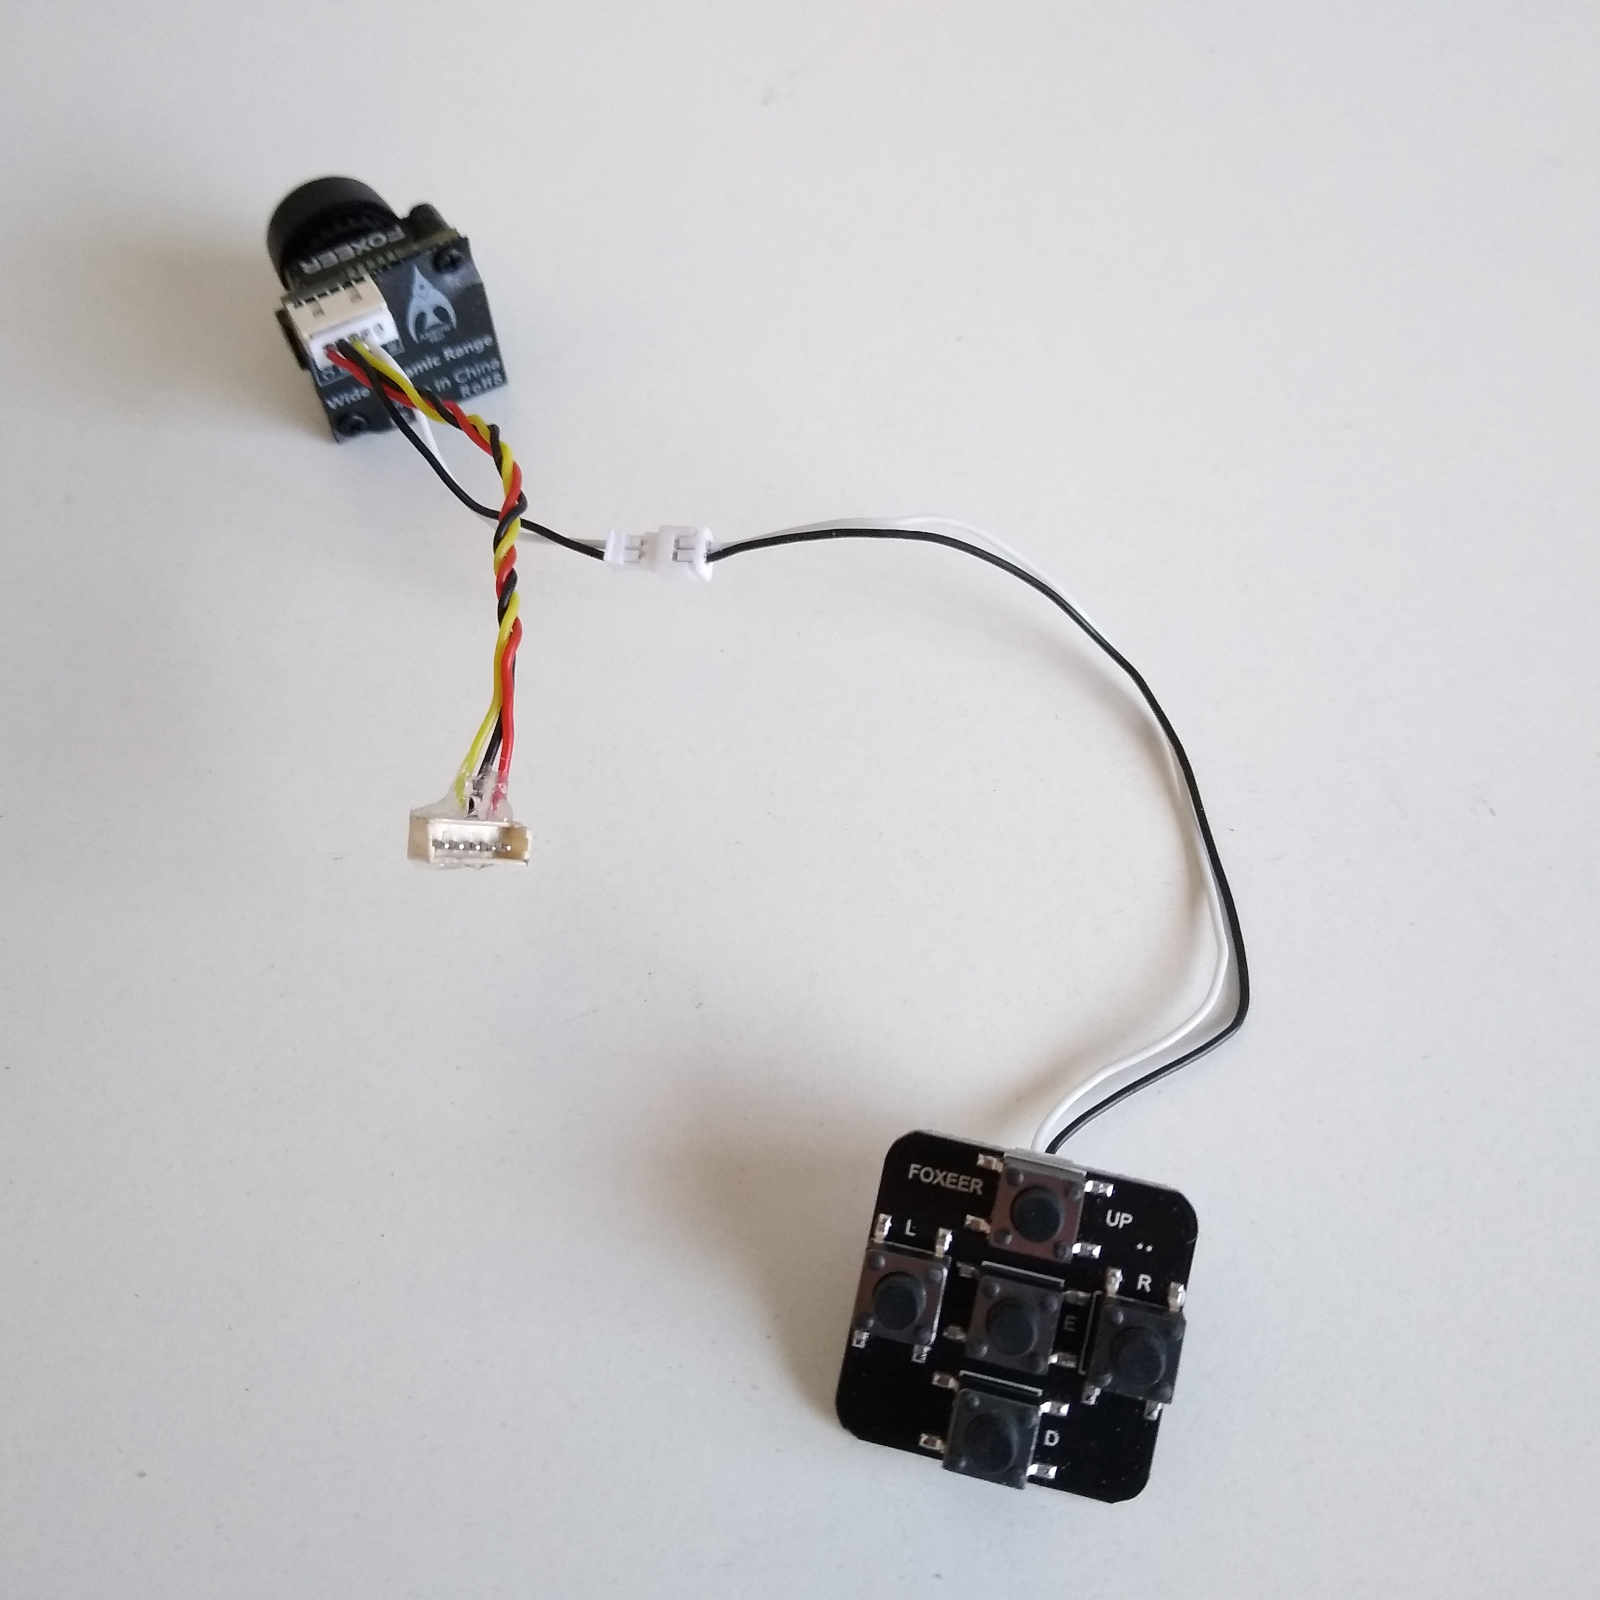
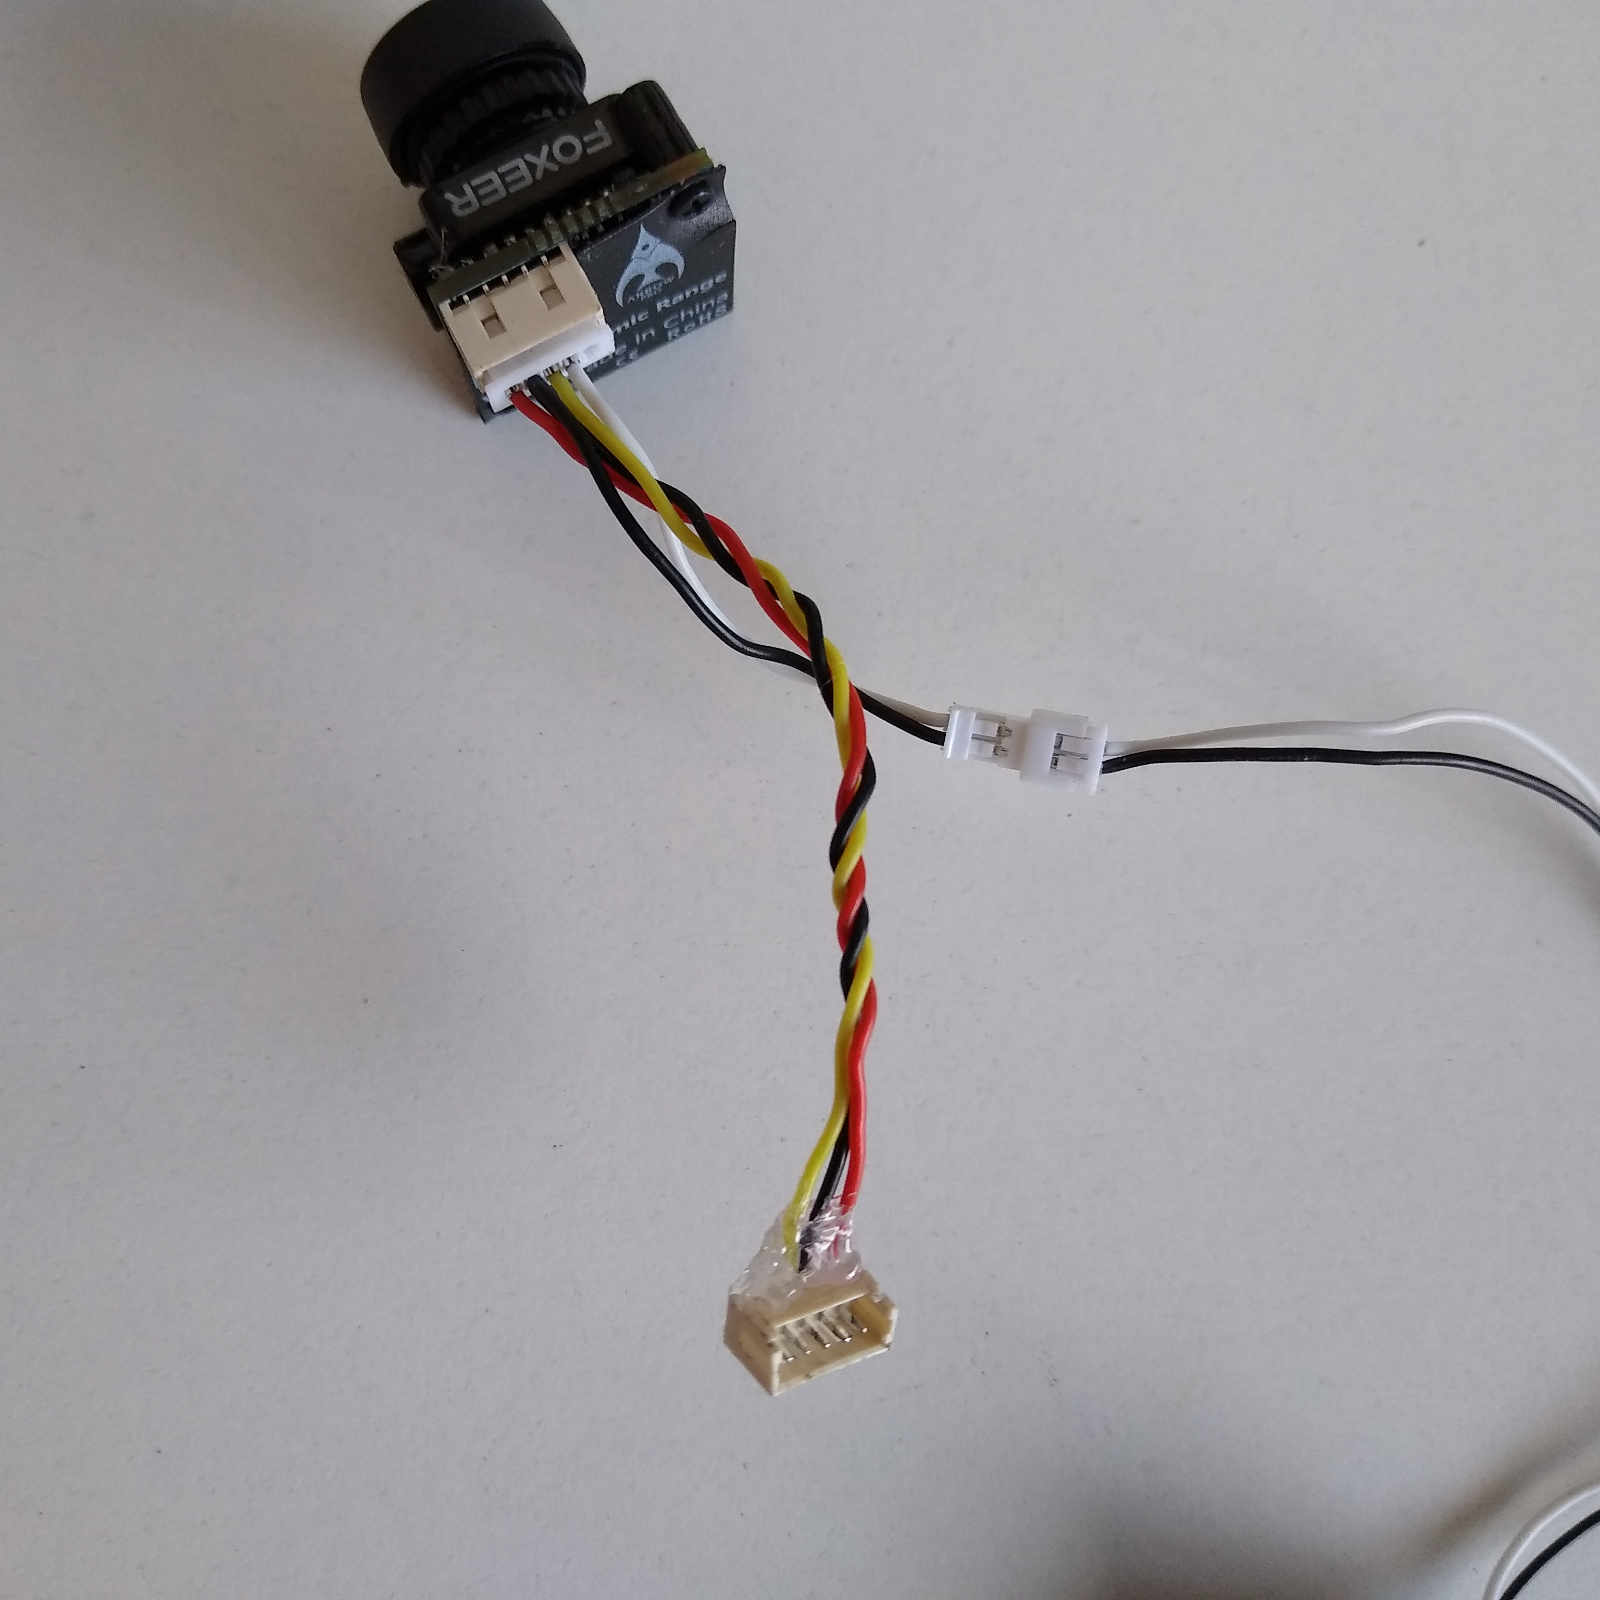
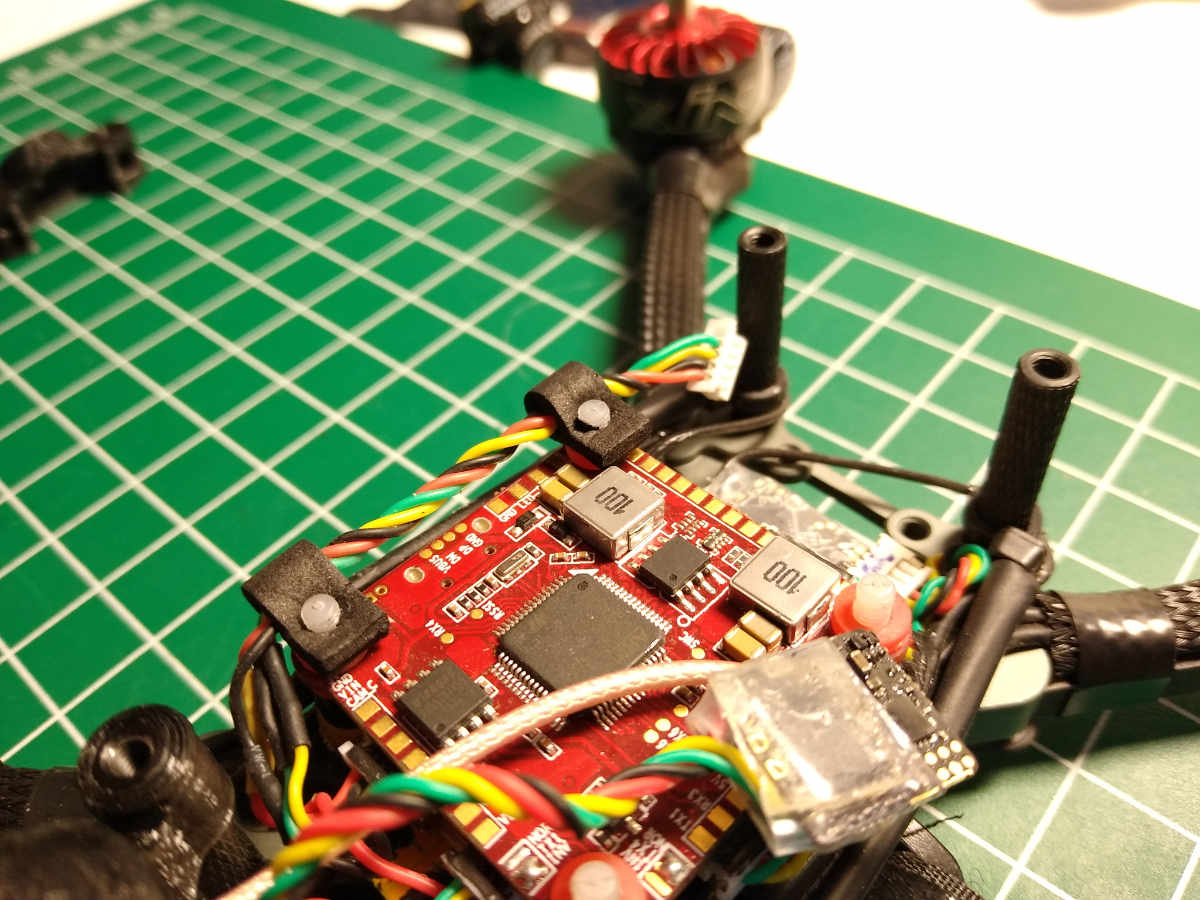
You typically don't want to ever mount anything on top of a flight controller, nor put nuts on the board to hold it down. This is in an effort to reduce all vibrations possible. This hack is simply a method of running wires along the flight controller and not above it for interference reasons. I do not believe this method will transfer much along the lines of additional vibrations.

  1. Raid you kids art supplies and try to track down some craft/hobby EVA foam sheets, or go pick some up from the store
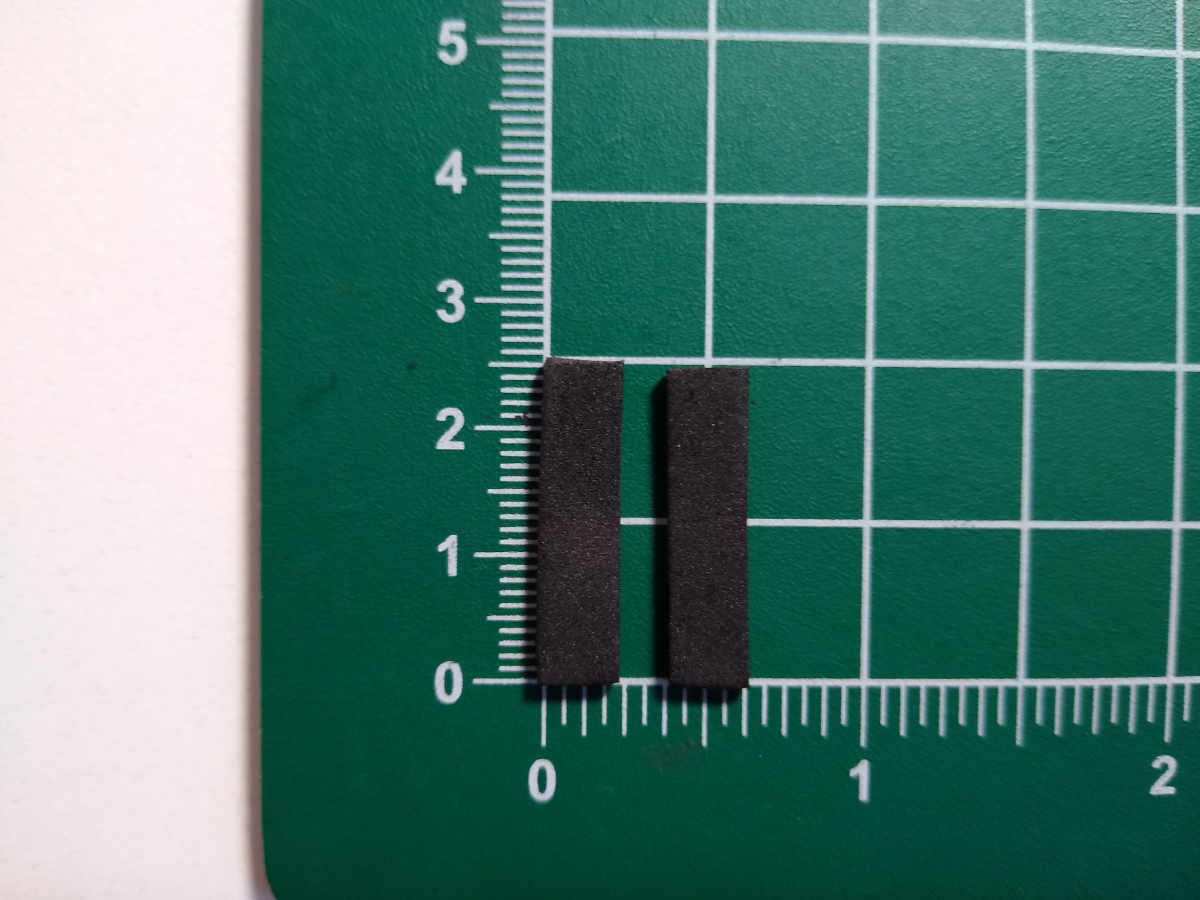
  2. For each mount point, cut a 5mm x 25mm strip of foam with an exacto knife
  3. Fold the piece of foam in half the long way
  4. Poke a small pilot slit through both pieces of the foam where the screw will go
  5. Enlarge the holes, I used a 2mm allen wrench to open them up
  6. Using tweezers, push one side of the foam strip down on the screw
  7. Run the wires and push the other side down to secure the wire

Easy as that. The nature of the EVA foam keeps it on the screw and makes it difficult to remove. I added a dab of liquid electric tape to the top of the screw just to be sure, but you probably don't need to glue these down.

Cam Control Bypass

foxeer camera

foxeer camera

This is a quick hack I came up with when setting up my FlightOne build after I discovered that FlightOne does not support camera control. Despite having a camera control pin, the FlightOne software doesn't have a mechanism to change the camera settings. One solution is to flash Betaflight on the board and then use it to control the camera settings and menus.

Since I didn't install the OSD bypass (B&W wires and connector) into the FPV camera harness, and I didn't want to change firmware to simply edit my cam settings. I want to be able to quickly change camera setup if for some reason I do some night flying or something of the sort.

My solution was to just build a bypass harness that you can connect between the camera and your flight controller. QED. It takes all of 5 minutes to unplug your FPV camera, install the bypass, and plug in your camera control pad, or joystick as it may be.

Now you might be thinking, this is silly, why not just install the connector for the control pad on the cam where it is supposed to be, right. Yeah, but I don't like that plug dangling around. And I rarely change cam settings. Hopefully FlightOne and FalcoX will get some camera control working soon, but until then...

Instructions (Too Easy):

  1. I'm sure you have junk FPV cams laying around, grab one
  2. Prepare a JST pigtail, you only need V, Gnd, Vid and OSD
  3. Wire in the control pad bypass wire/plug
  4. Using a Dremel with a small grinding wheel, grind off the pins and soldering from the front side of the camera board
  5. Gently pry back and forth on the JST connector till is comes free
  6. Tin the back of the pins and the V, Gnd and Vid wires
  7. Solder carefuly onto the JST connector
  8. Dab some hot glue on the back of the connector to keep the unused pins and wires in place, and BAM

Sidenote:

Do you ever notice those pilots with "Foxeer", or "RunCam" on their OSD's. Here is my theory:

Camera control from the FC cant seem to simulate a medium length press in order to access the OSD settings on the FPV cam. You can change the other settings, but you need the control pad to get rid of the OSD items such as the name. Anyway, just build yourself a camera control bypass and fix all your quads in one go, wallah.

FPV2 Hello world!

Bookmark this site. This is where you will find all my tools and hacks related to FPV quadcopter racing.